
DeliLabel Mobile Module
Navigating the Main Screen
The main DeliLabel screen displays a grid of product tiles. A tab bar at the bottom of the screen allows you to switch between the following views:
Recent: Displays products that were recently printed or accessed.
PLU Print: Provides a quick-entry view for finding and printing products by PLU or SKU number.
Page 1, Page 2, and Additional Pages: These are customizable pages containing product tiles. Tap the + button in Edit mode next to the page tabs to create another page.
Search Products: Tap the search icon in the lower-right corner to open Search Products. You can search for any item across all categories by product name, SKU, and UPC.
Edit Mode
Edit Mode is achieved by pressing and holding a tile on the DeliLabel page. It allows you to add pages, and add tiles to them.
Adding a Product to a Page
1. Open the page where you want to add the product.
2. Enter Edit Mode by pressing and holding a tile on the DeliLabel page.
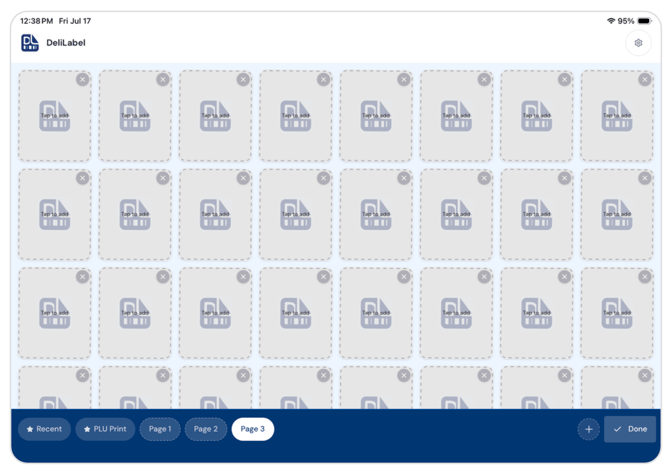 3. Tap an empty tile marked Tap to add.
4. Find the product by searching my name, SKU, UPC, or category.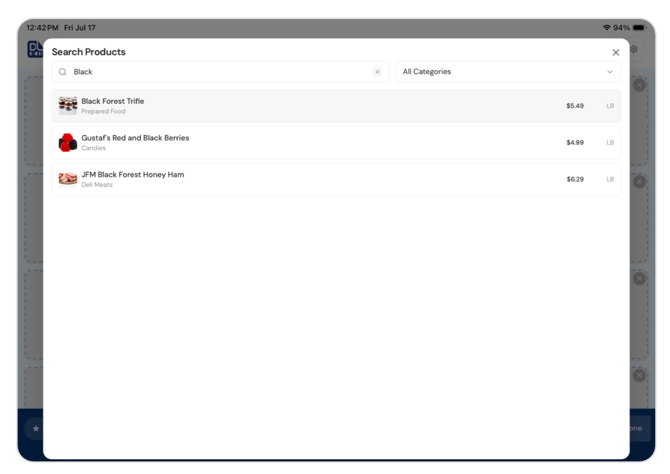 5. Select the product from the results.
The product's image, name, and category now appear on the tile.
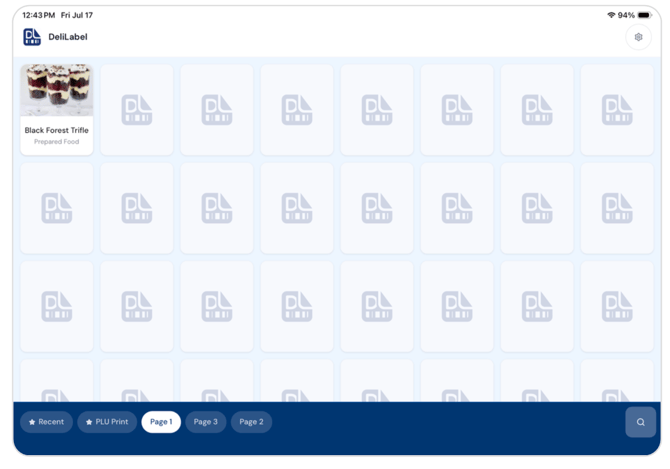 6. To remove a product from the page, tap the small X in the corner of its tile.
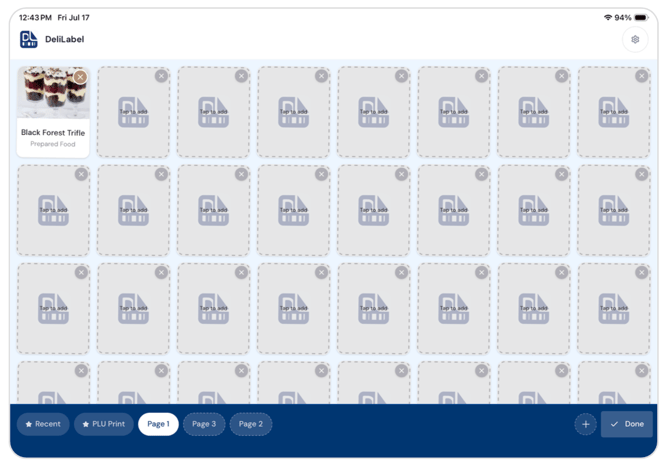 7. Tap Done when you have finished editing the page.
Adding a Page
1. Enter Edit Mode by pressing and holding a tile on the DeliLabel page.
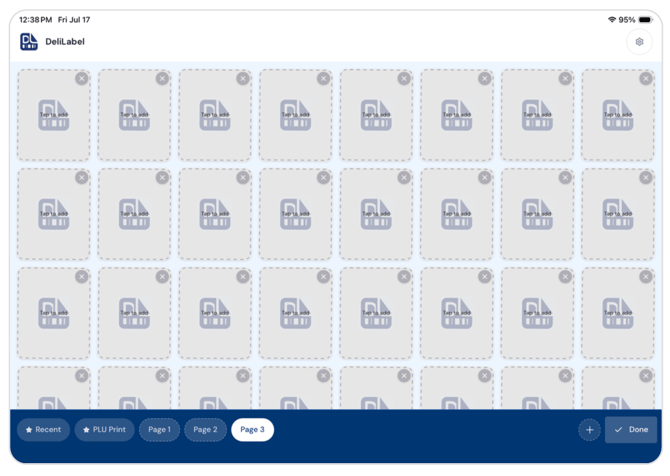 2. Press the + icon in the lower right corner.
3. Enter the name of the page you want to add.
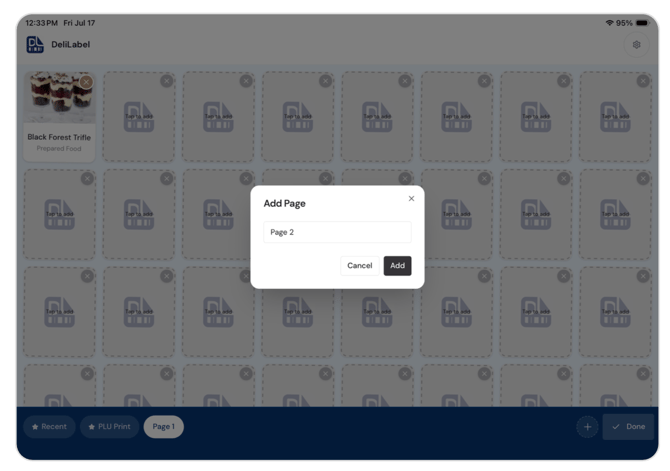
4. Press Add to save the changes.
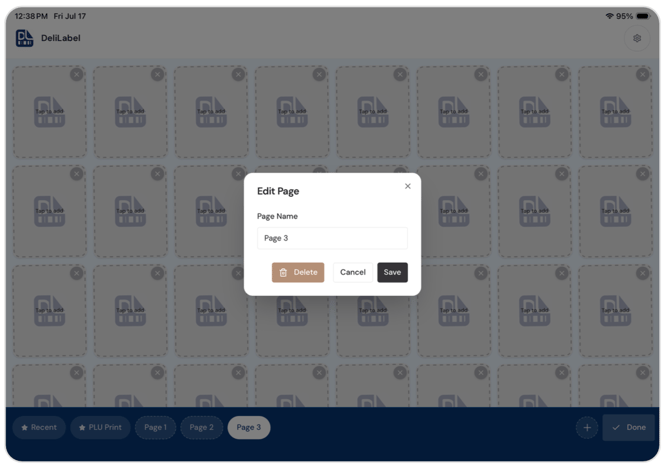
5. To delete a preexisting page, select it from the toolbar and click Delete.
6. To reorder pages, drag one oval on top of another.
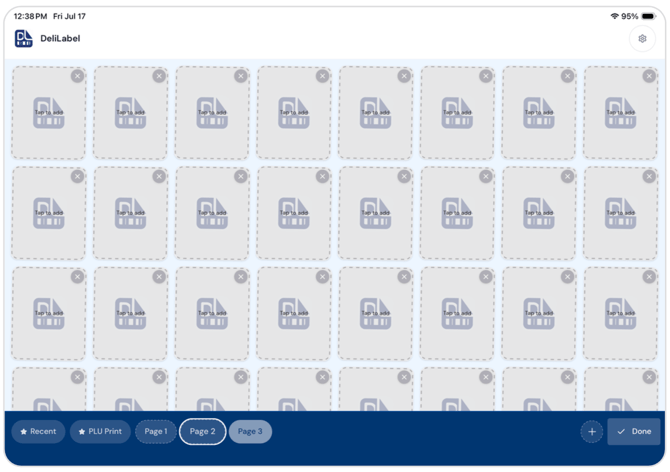
7. Tap Done in the lower right corner when you have finished editing the page.
Weighing & Printing a Label
Tap a product tile to open its label screen. This is where you configure the label, weigh the item, and send the label to the printer.
1. Review the product information in the header.
The header displays the product name, SKU, category, and Add to Inventory toggle.
2. Example:
Black Forest Trifle — SKU 00040 — Prepared Food
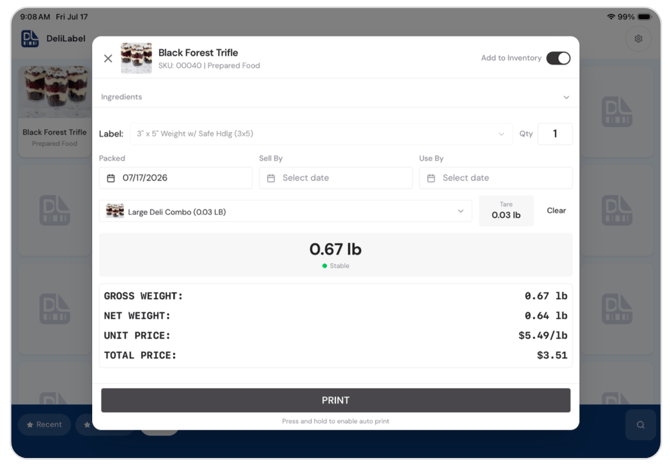 3. Expand Ingredients to review ingredient statement that will appear on the label.
4. Select a Label Format from the dropdown menu.
Example:
3" × 5" Weight w/ Safe Hdlg
5. Set the Qty, or number of labels to print.
6. Review the Packed date.
The Packed date defaults to the current date.
7. Adjust the Sell By and Use By dates if needed. These dates automatically populate after the item is weighed, based on the product's configured shelf-life rules. For example, the Sell By date may be set to seven days after the Packed date.The dates can still be edited manually.
8. To edit a date:
- Tap the date field.
- Select a date from the calendar.
- Tap the checkmark to confirm.
- Tap Reset to clear your change.
9. Tap Select container and choose the container or packaging being used. Selecting a container applies its tare weight, which is subtracted from the item's gross weight.
10. For some items, a container must be selected before printing is allowed. Until a container is selected, the Print button remains disabled and displays: Container/tare weight is required before printing. You can configure this further in the mymst.app site.
11. Place the item on the connected scale.
12. The live weight appears in large text in the center of the screen. A status indicator displays Stable once the scale reading has settled.
13. As the weight changes, the following values update automatically:
- Gross Weight
- Net Weight: Gross weight minus tare weight
- Unit Price
- Total Price
14. Once a container is selected and a stable weight is detected, the button at the bottom of the screen becomes an active PRINT button.
15. Tap PRINT to print the label.
Auto Print
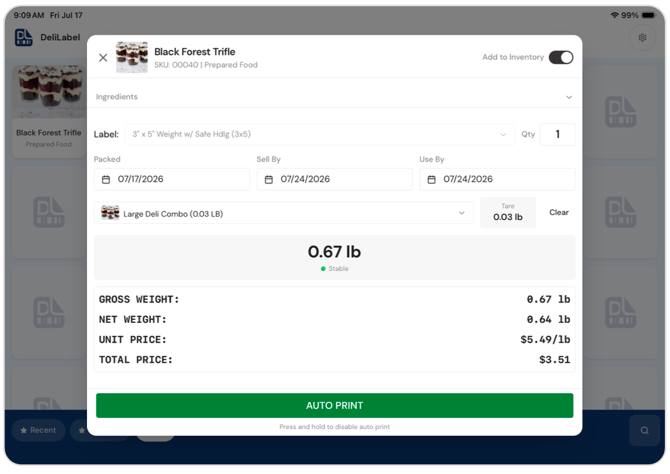
For repeated items at a busy station, DeliLabel can automatically print a label whenever a stable weight is detected. This removes the need to tap the Print button for each item.
1. Press and hold the PRINT button to enable auto print.
2. The button turns green and displays AUTO PRINT.
The following message also appears:
Press and hold to disable auto print.
3. While auto print is enabled, a label prints automatically each time a new stable weight is placed on
the scale.
4. No additional tap is required.
5. Press and hold the button again to disable auto print.
TIP: Auto print is best used during a run of identical products, such as printing multiple Black Forest Trifle labels in succession.
DeliLabel Web Admin Portal
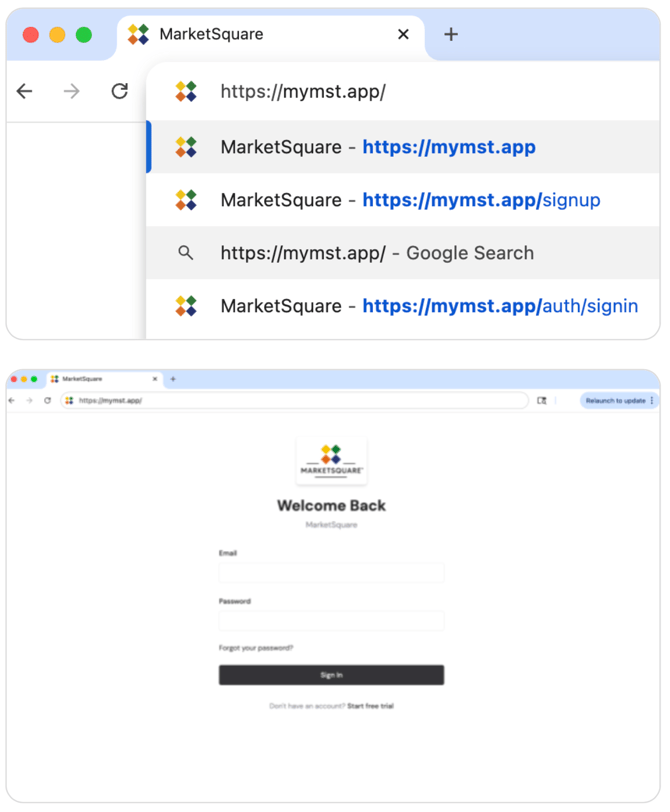
In addition to the iPad app (see features above), MarketSquare provides a web-based admin portal. You can navigate there by entering mymst.app in your browser window.
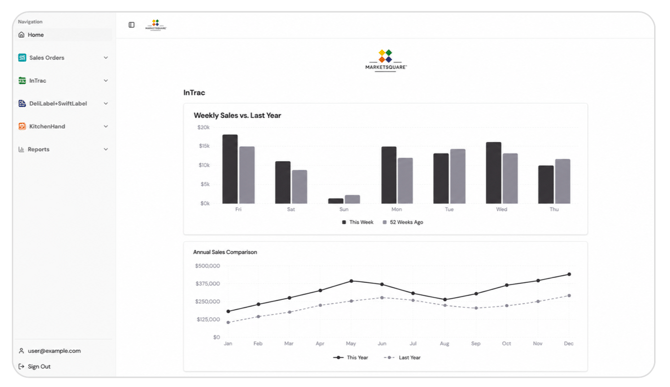
The portal is used to manage the product catalog, per-item label settings, label formats, print statements, standard containers, tare weights, and other settings used by DeliLabel and other MarketSquare modules.
Product Catalog
Under DeliLabel + SwiftLabel, select Catalog Items to open the Product Catalog. The Product Catalog is a searchable list of items from your Square catalog.
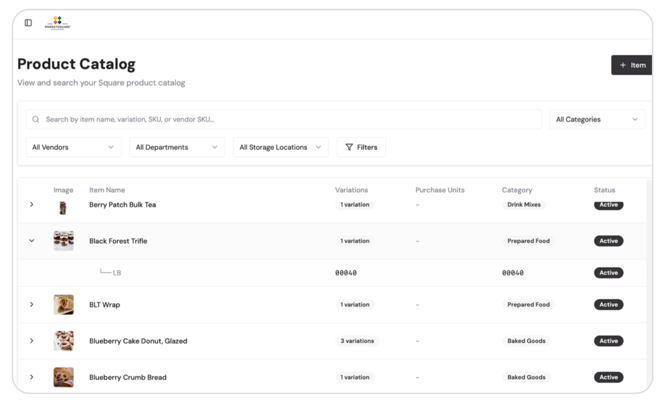
1. Search for a product using its:
- Item name
- Variation
- SKU
- Vendor SKU
2. Narrow the list using the available controls:
- All Categories
- All Vendors
- All Departments
- All Storage Locations
- Filters
3. The catalog table displays information such as:
- Product image
- Product name
- Number of variations
- Purchase units
- Category
- Status, such as Active or Inactive
4. Tap the arrow next to an item to expand its variations.
For example, Black Forest Trifle may expand to show:
- Variation: LB
- SKU: 00040
5. Tap a row to open the item-detail panel on the right side of the screen.
6. The item-detail panel contains tabs such as:
- Details
- Purchase
- Labels
- Depts
- Storage
- History
- Acct
- Pricing
- Recipe
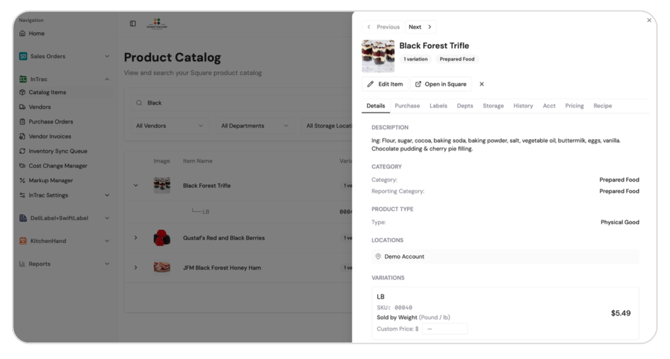 7. Use Edit Item to modify the item's core details.
8. Use Open in Square to view the item directly in Square.
9. The Details tab displays information such as:
- Product description or ingredient statement
- Category
- Reporting category
- Product type
- Locations where the item is active
- Product variations
- SKU
- Unit type
- Price
10. Example unit type:
Sold by Weight — Pound / lb
Configuring Label Settings for an Item
The Labels tab in an item's detail panel controls how that item behaves and prints inside DeliLabel.
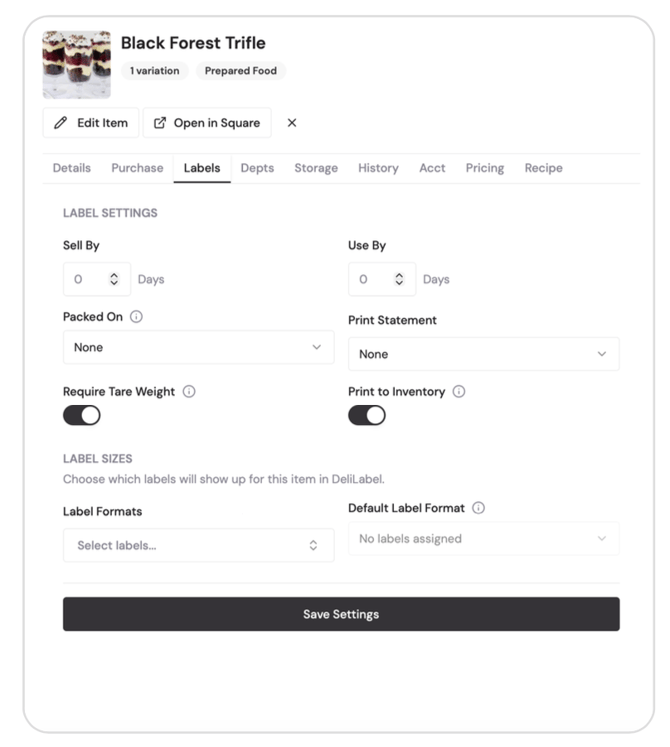
Sell By and Use By: Enter the number of days after packing that the item is considered sellable or usable. These values determine the Sell By and Use By dates that automatically populate when a label is printed in the iPad app.
Packed On: Select None or Standard to control whether a Packed date is applied and how it is calculated.
Print Statement: Select a standard print statement to include with the label, or select None.
Require Tare Weight: When enabled, a container or tare weight must be selected before the item can be printed. This setting causes the following message to appear in the app when no container has been selected: Container/tare weight is required before printing
Print to Inventory: When enabled, printing a label for this item also records the item in inventory. This corresponds with the Add to Inventory toggle on the item's print screen in the iPad app.
Label Formats: Choose which label formats are available for the item in DeliLabel. Use Default Label Format to select the format that should be preselected when the item is opened. If no formats have been assigned, the fields may display: Select labels… or No labels assigned.
Saving the Settings: Tap Save Settings to apply your changes.
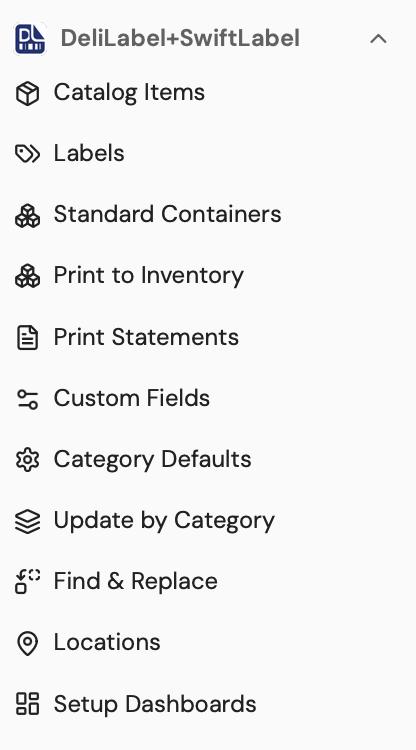
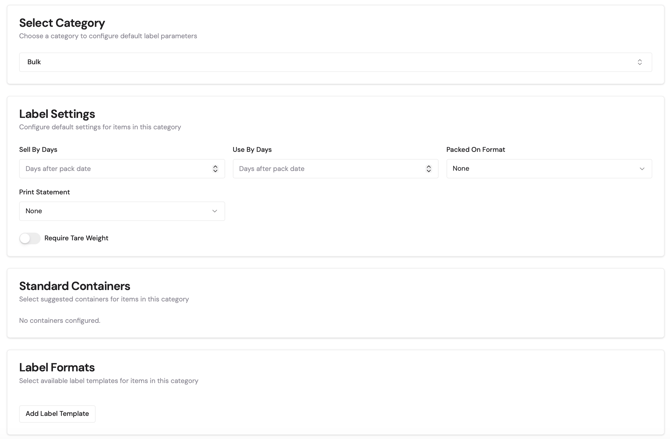
TIP: You can also manage these settings for entire catalogs and categories at a time by selecting Category Defaults in the lefthand dropdown menu, as shown below.
Managing Standard Containers
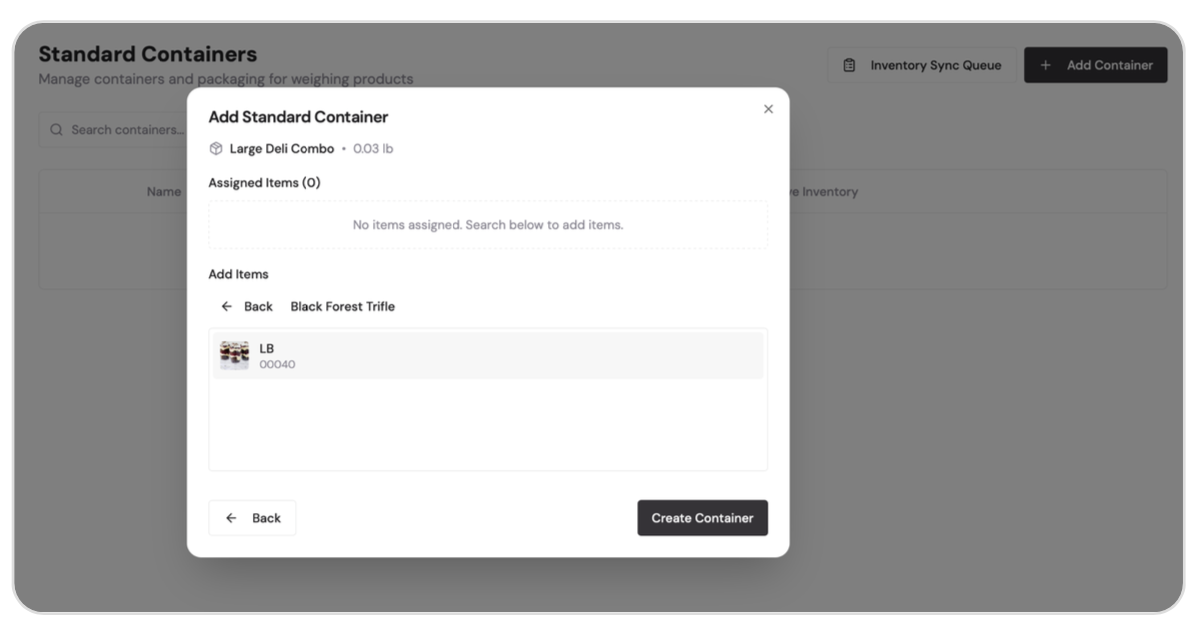
Under DeliLabel + SwiftLabel, select Standard Containers. Standard Containers allows you to manage reusable containers and packaging options with known tare weights. These containers appear in the Select container dropdown in the DeliLabel iPad app. The Standard Containers page includes:
- An Inventory Sync Queue button
- A search box for existing containers
- An option to create a new container
Creating a New Container
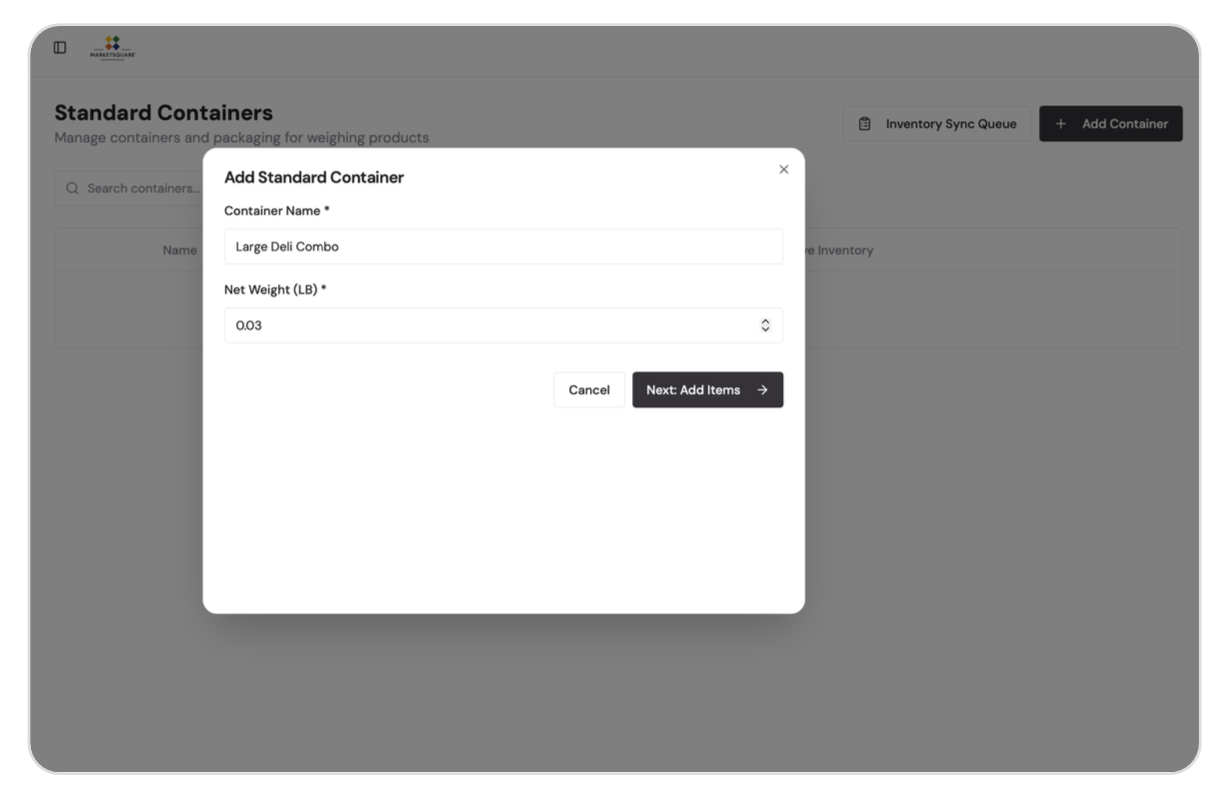
1. Tap + Add Container.
2. Enter a Container Name.
Example:
Large Deli Combo 3. Enter the container's Net Weight (LB).
This is the tare weight that will be subtracted from the gross weight when the container is
selected in the app.
 4. Tap Next: Add Items.
5. On the next screen, search for products under Add Items.
Enter at least a few letters of the product name.
For example, searching for black may display:
- Black Forest Trifle
- JFM Black Forest Honey Ham
- Other similar products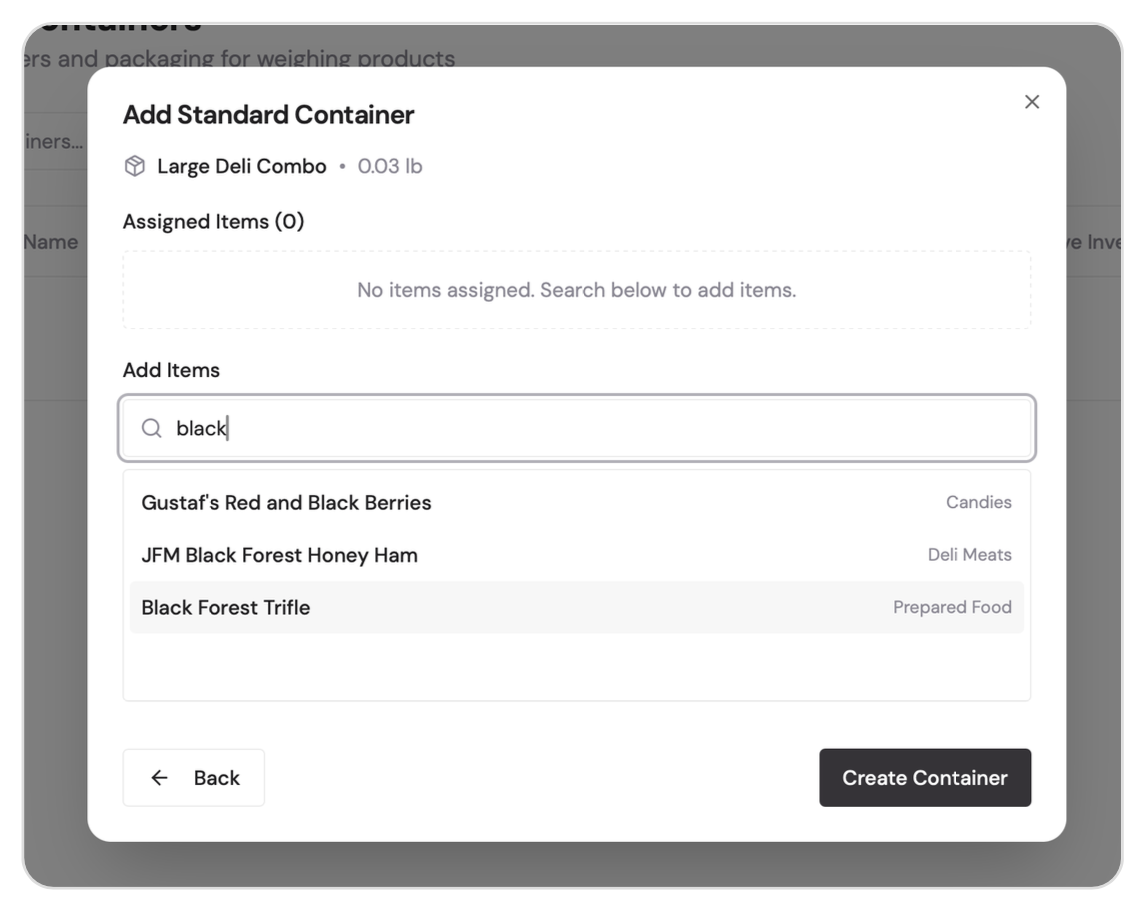
6. Tap a search result to assign the product to the container.
7. Assigned products appear under Assigned Items.
8. Tap Create Container to save the new container.
9. Tap Back to return to the previous step without creating it.
Editing an Existing Container
1. Select a container from the Standard Containers list to open Edit Container.
2. To remove an assigned product, tap the X next to it.
3. To assign additional products, search under Add Items and select the products you want to add.
4. Enable Remove from inventory when used if using this container should automatically deduct the container from inventory.
5. Tap Save Changes when finished.
TIP: Configure your Standard Containers and per-item Label Formats in the web portal before a busy shift. Proper setup makes the Select container and Label dropdowns in the iPad app faster and more accurate at the register.