
 InTrac
Applies to: the current MarketSquare platform — mymst.app. Not applicable to the legacy V2 platform (beta.intrac.app).
 On your computer the web back office ·
 In the app phone, tablet or scale device
👉 Tap this press it in the app · Exact label look for this wording on screen
What this does
The full  InTrac purchasing cycle: build a purchase order with live sales data in front of you, send it, scan the delivery in, reconcile the vendor's invoice with AI assistance, and push confirmed costs and counts into Square. One flow, no double entry.
Where this happens: ordering and reconciling are computer work. Receiving is where the app earns its keep — your team scans at the dock on a phone. Watch the badge on each step.
- The vendor is active in InTrac.
- The items you will order have Purchase Units for that vendor (see Adding Purchase Units).
Create the purchase order On your computer
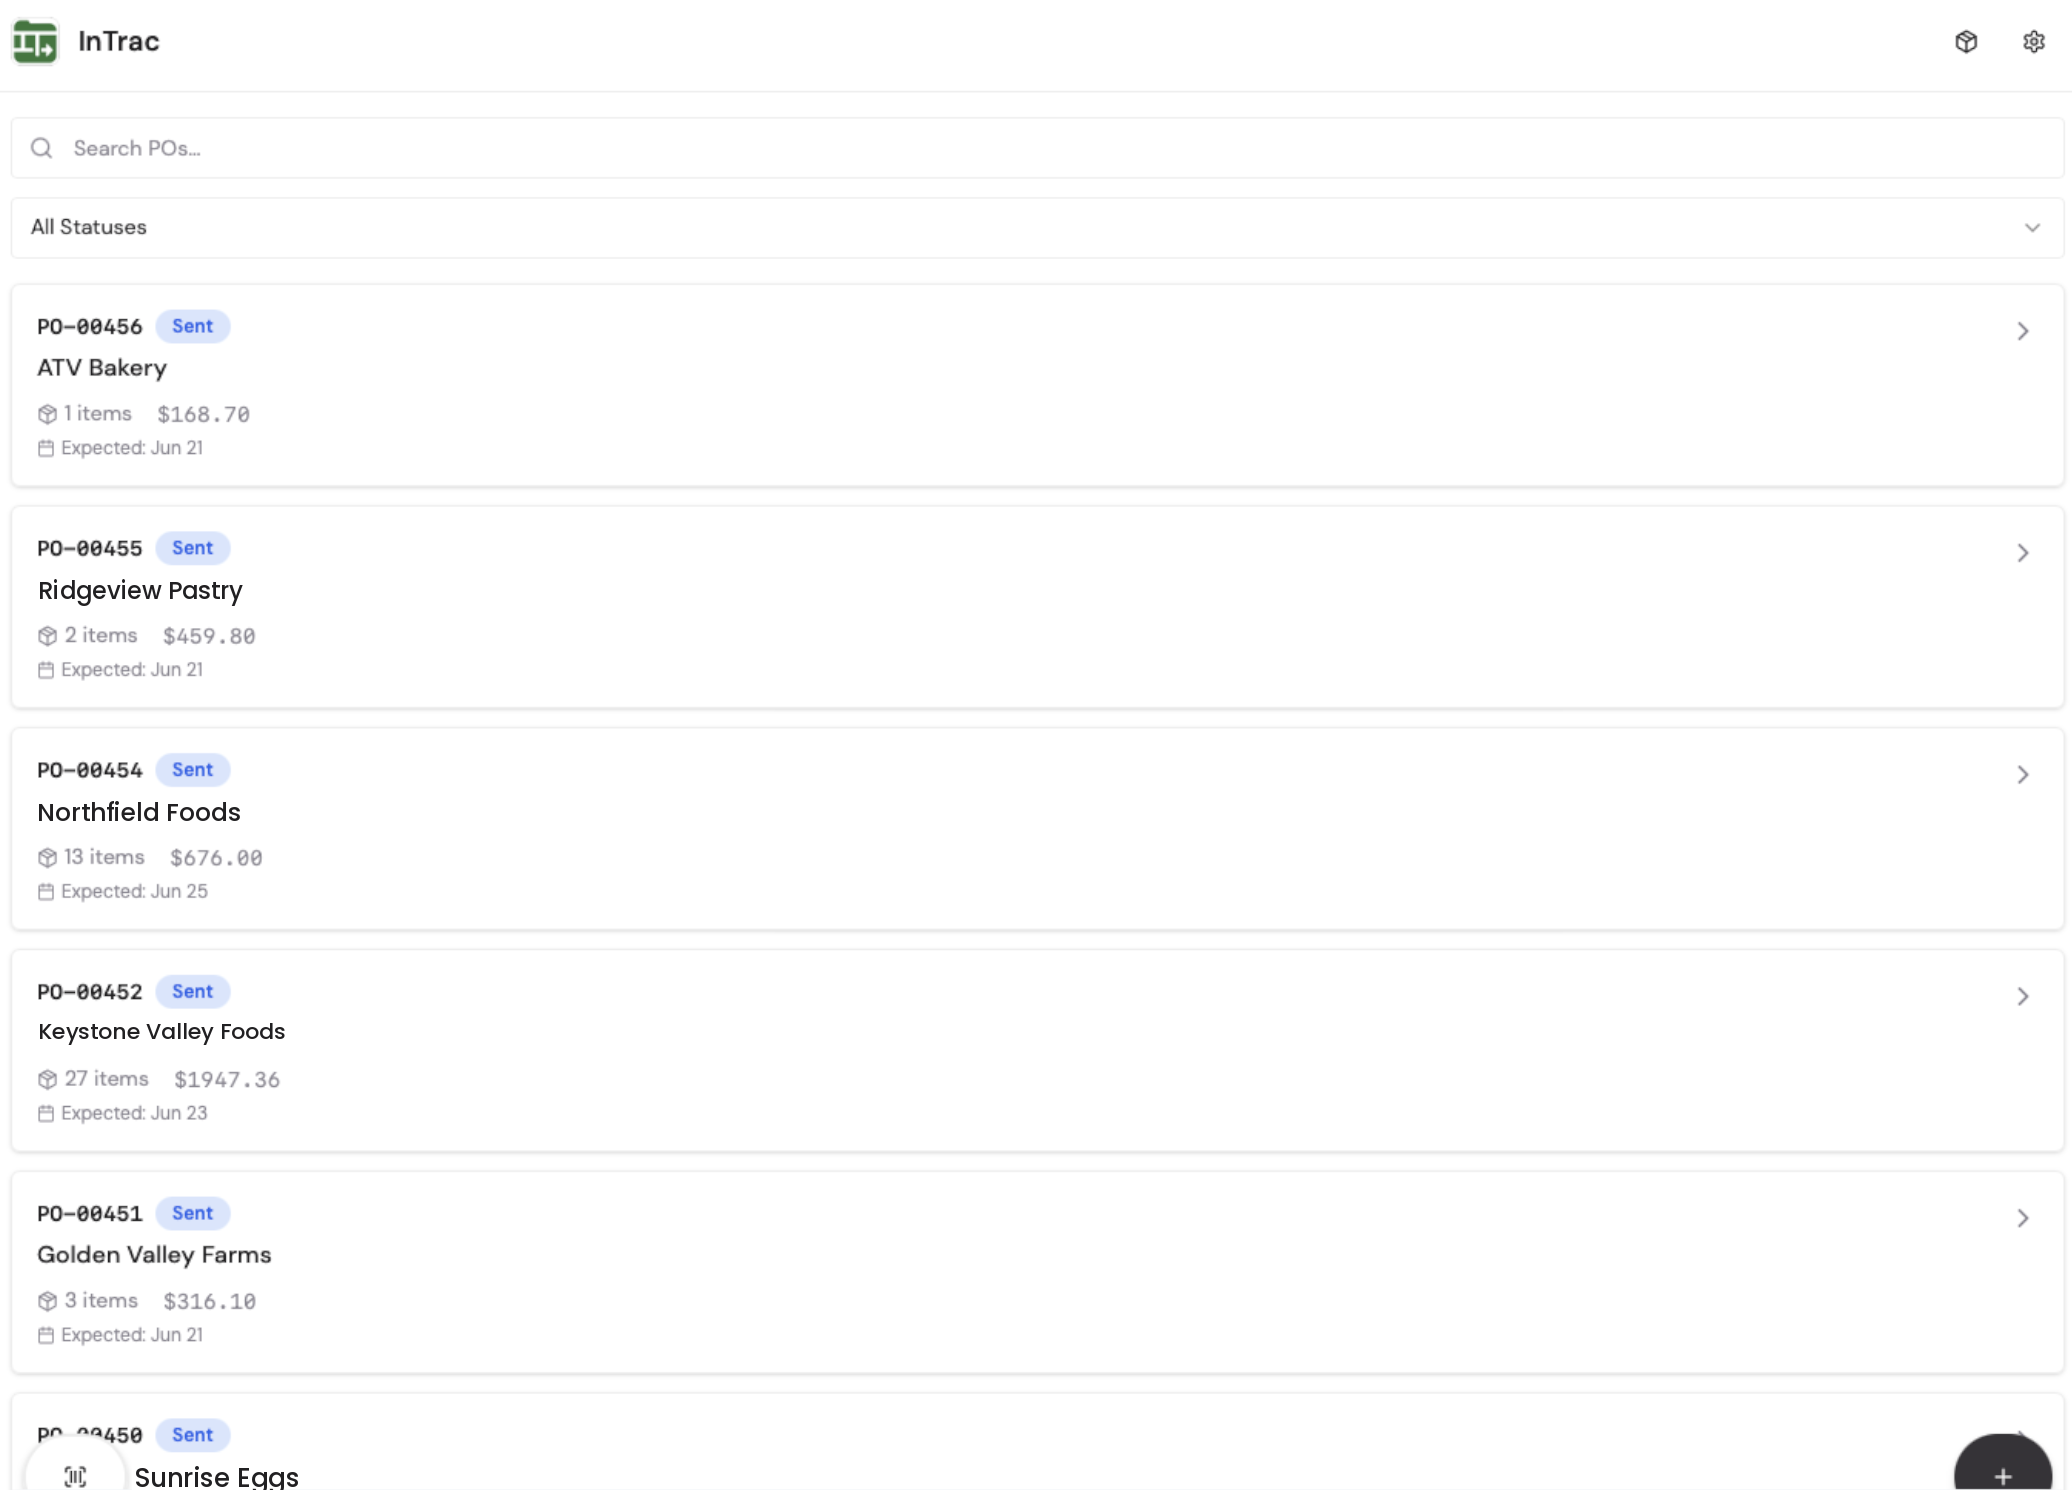
From the purchase order list, + New PO and choose the vendor. The order gets a number and starts in draft; the list shows every order with its status, line count, total and expected date.
Add items — with sales data in front of you On your computer
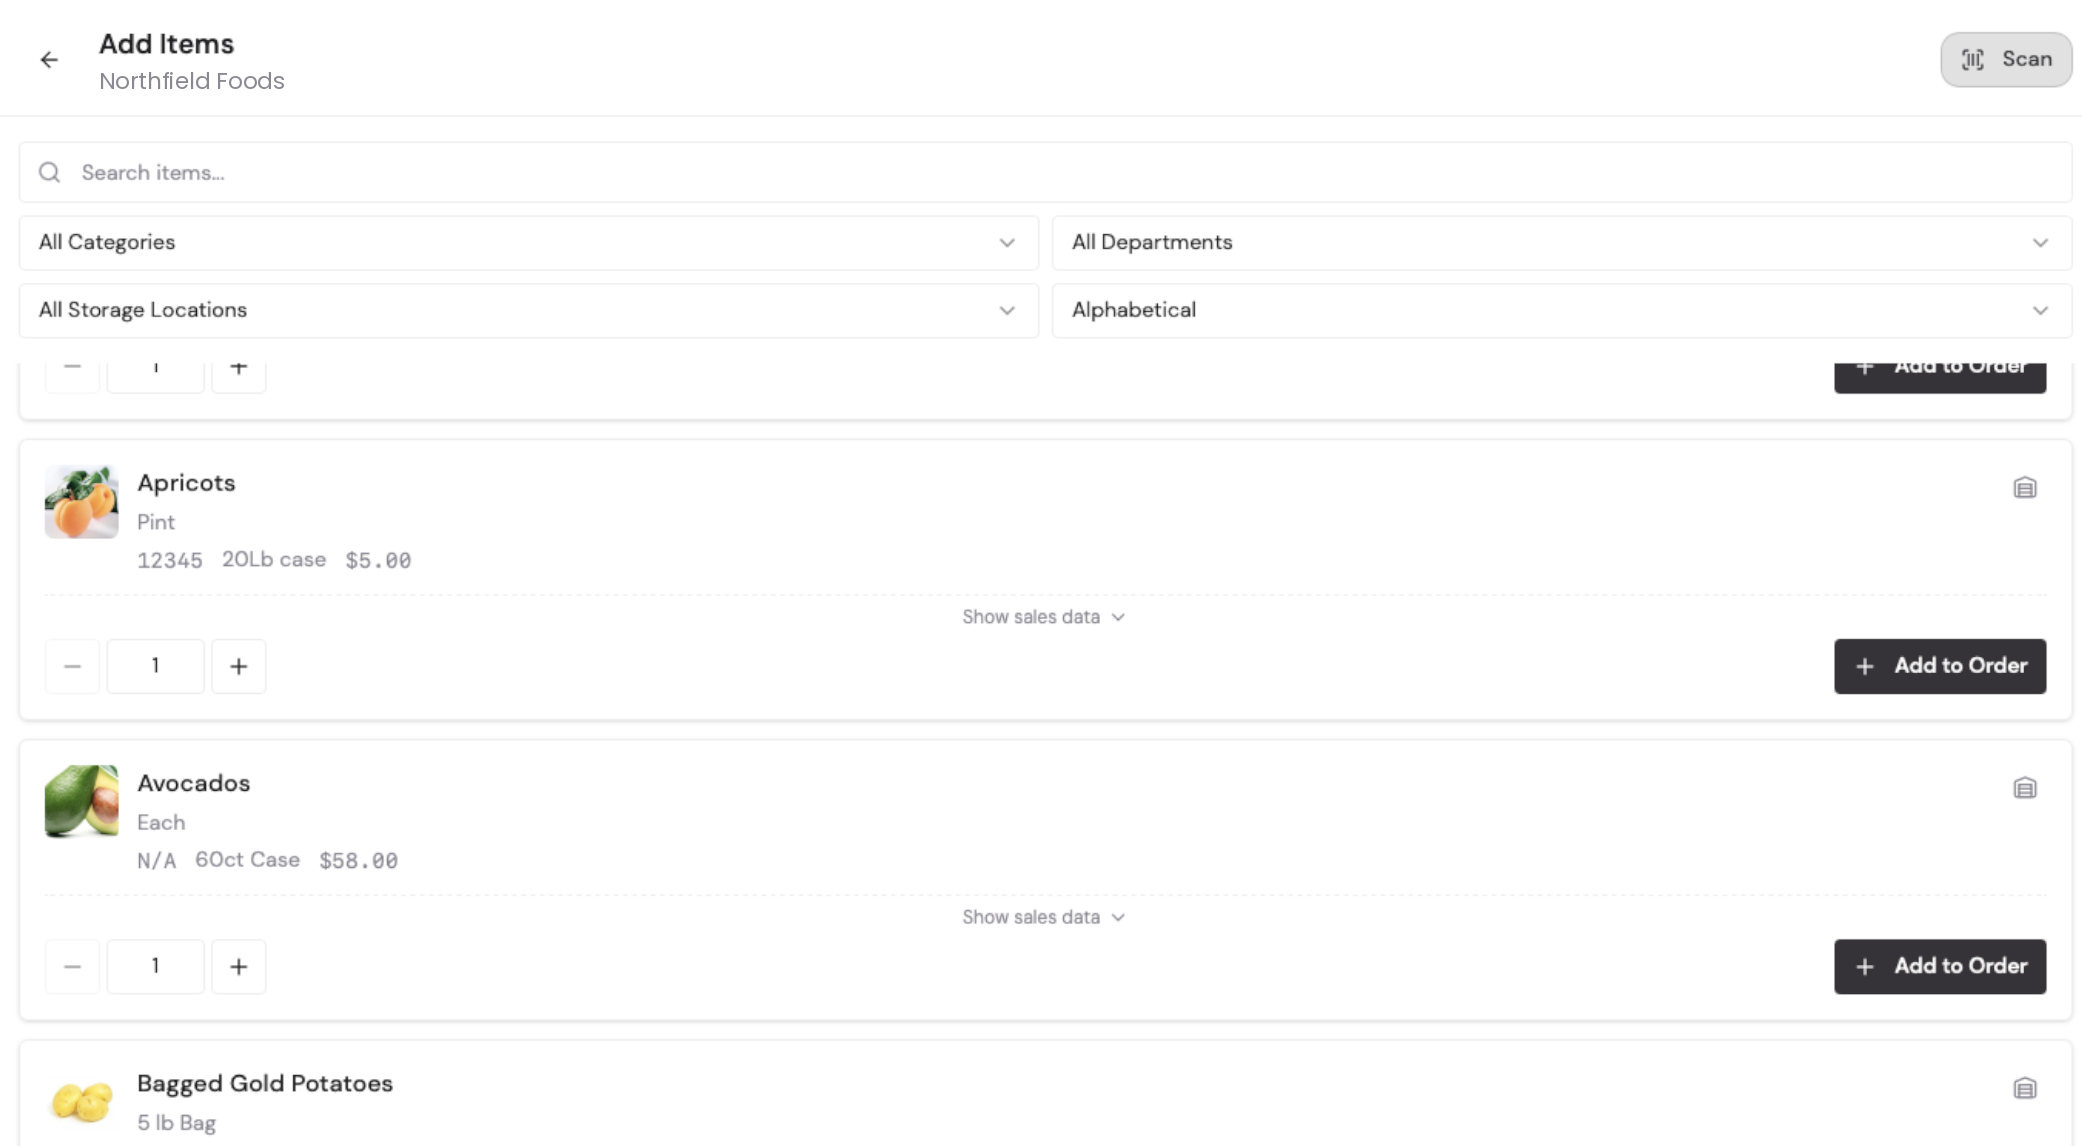
Filter by category, department or storage location to pull up that vendor's items. Open Show sales data on any line to see recent movement before you commit to a quantity, set the number of cases, then Add to Order.
Confirm the delivery details On your computer
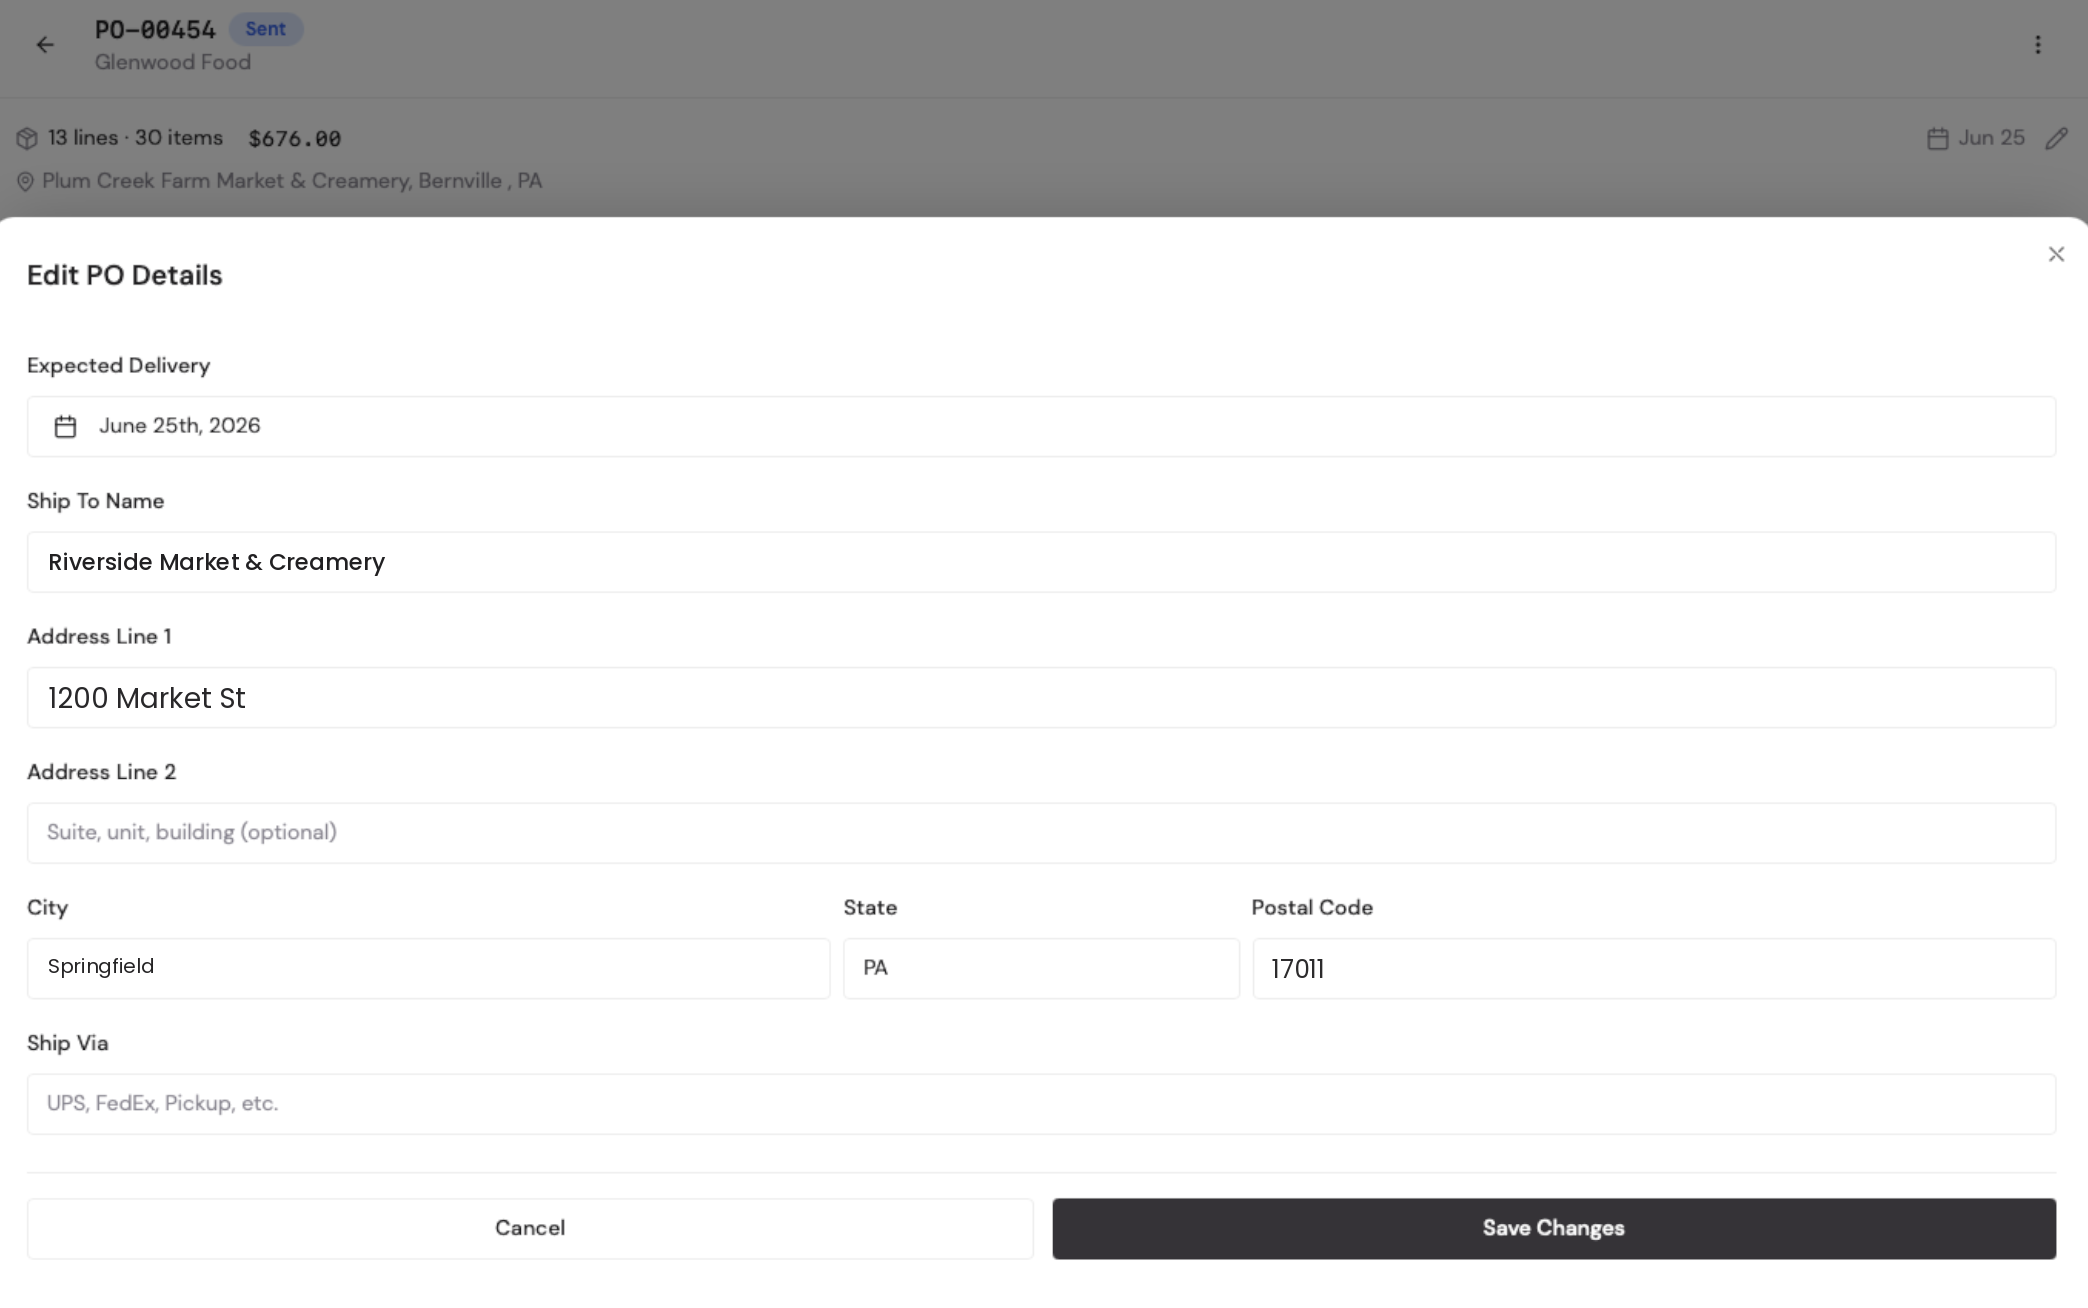
Open Edit PO Details to set the expected delivery date and confirm the ship-to address.
Send it to the vendor On your computer
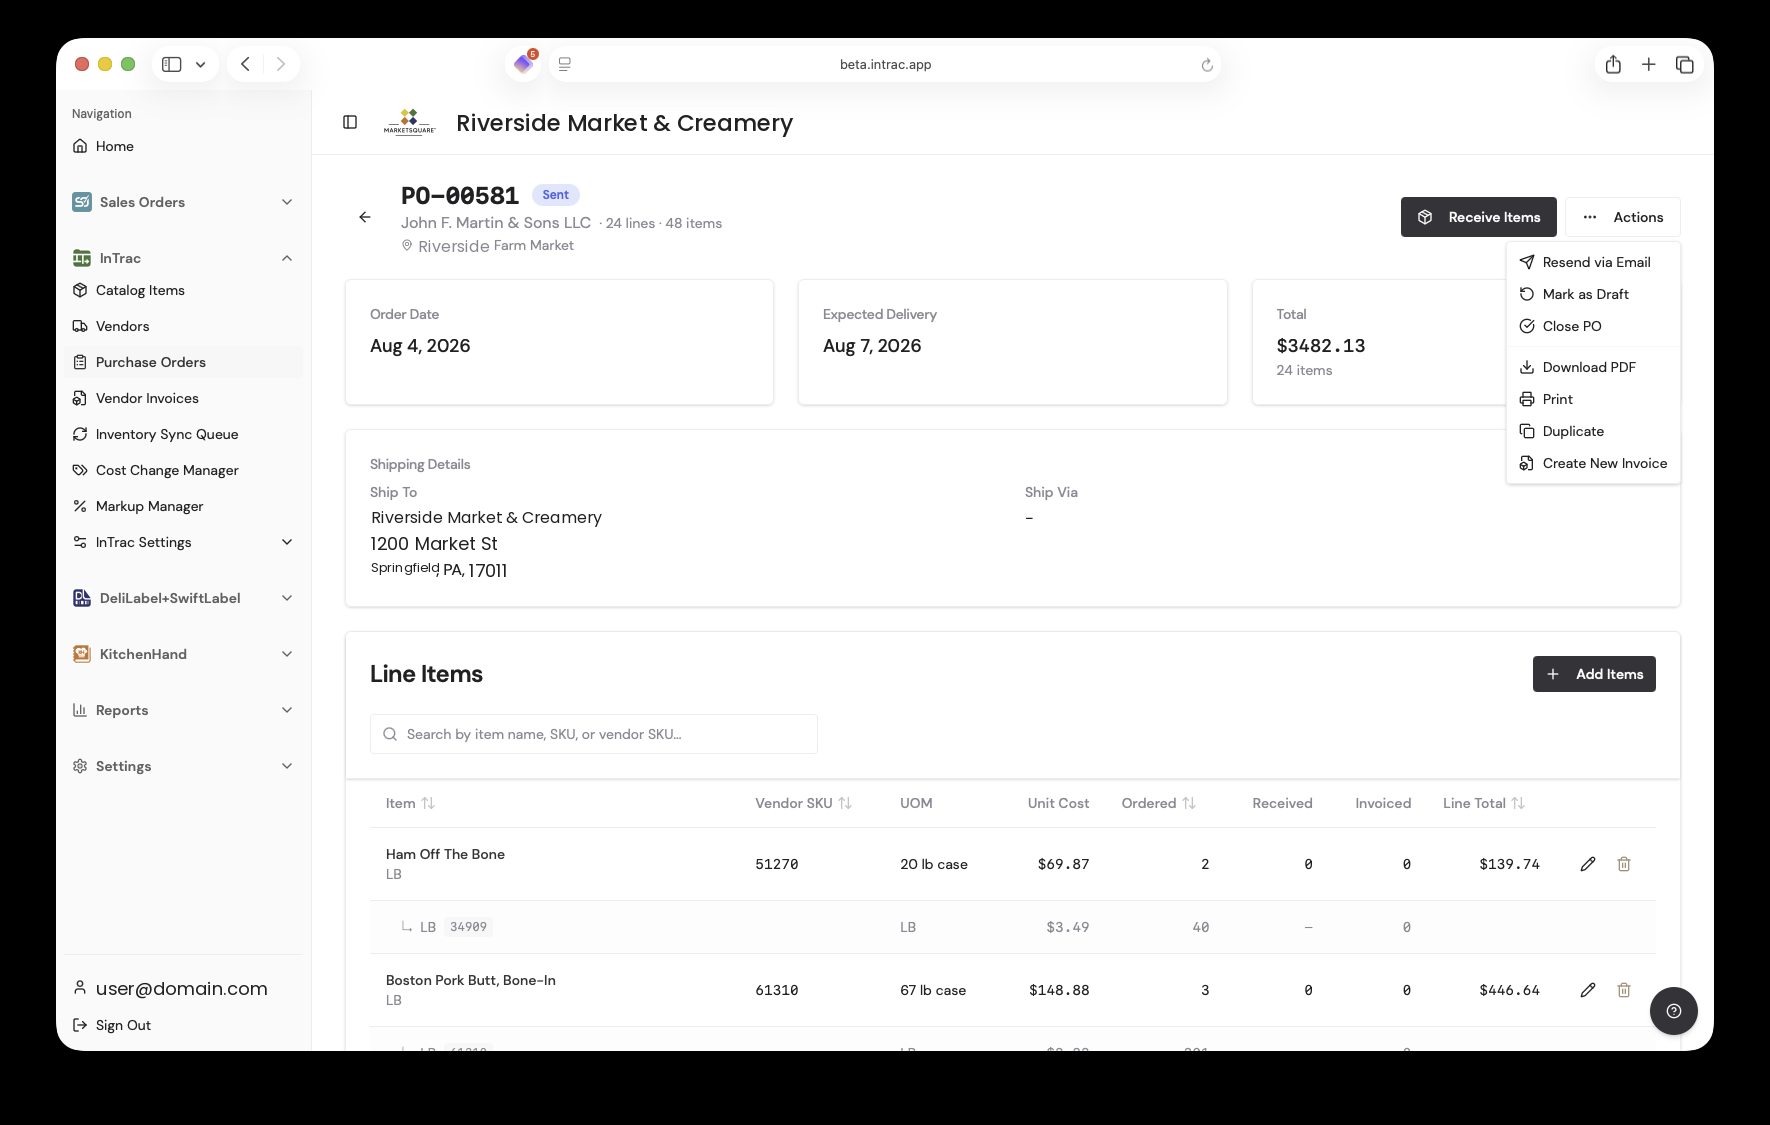
Email the order to the vendor directly from InTrac, or download it as a spreadsheet to attach or upload to a vendor portal. The status changes to Sent.
Receive the delivery In the app
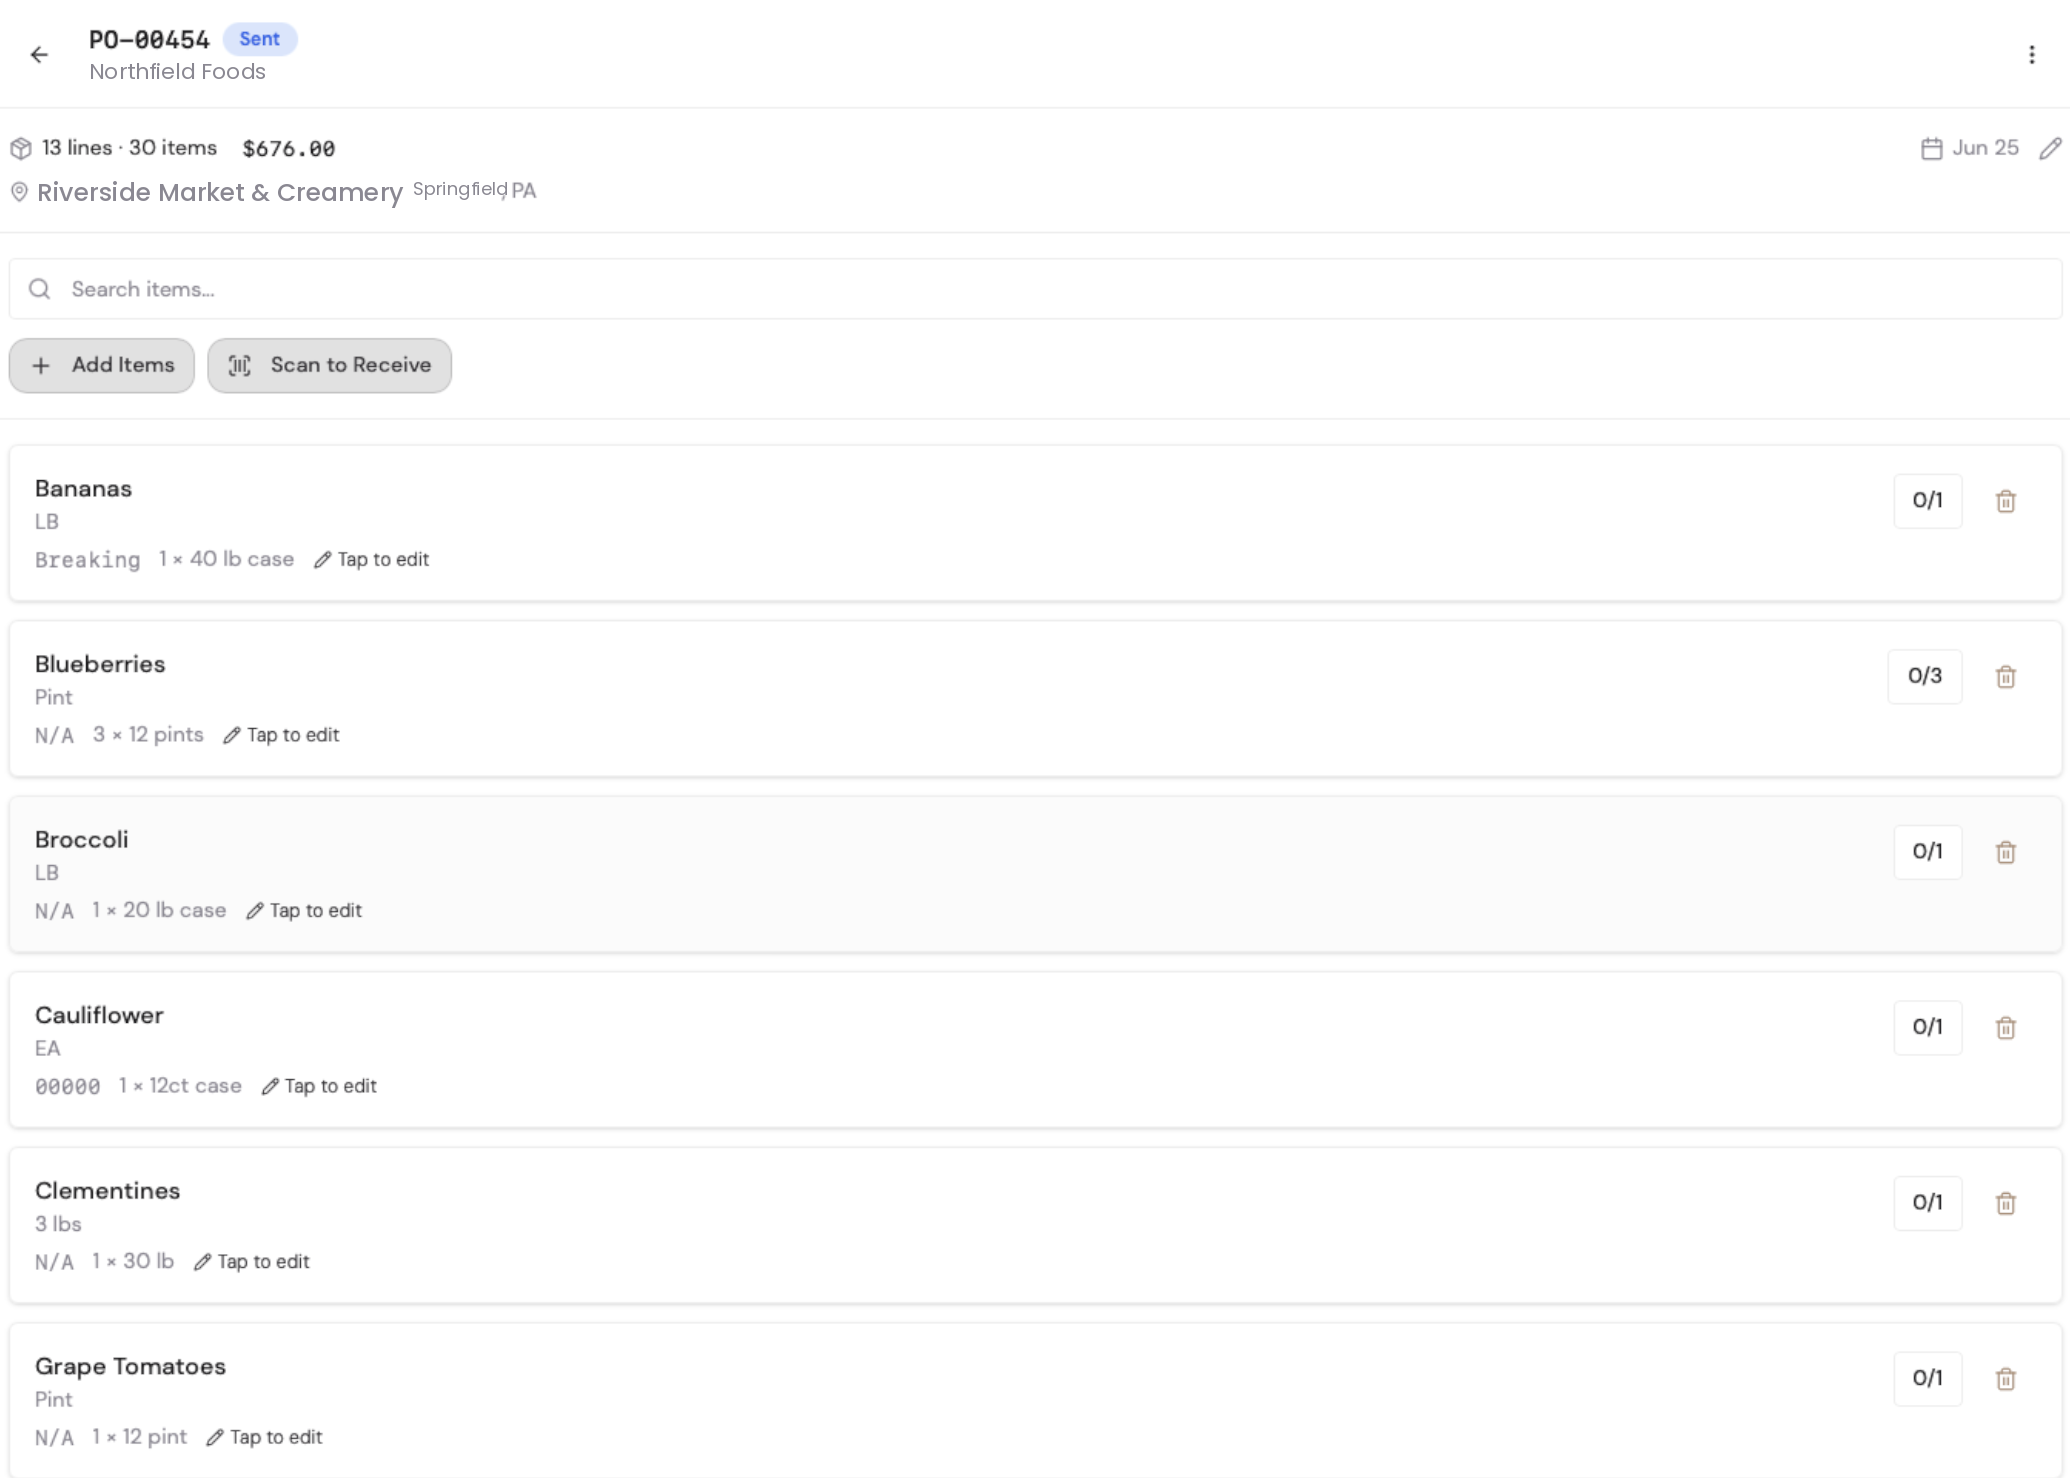
When the truck arrives, open the order on a phone or tablet and 👉 Scan to Receive — or tap each line to key in counts. The received/ordered counters on every line make shorts and overs obvious before the driver leaves.
Reconcile the vendor invoice On your computer
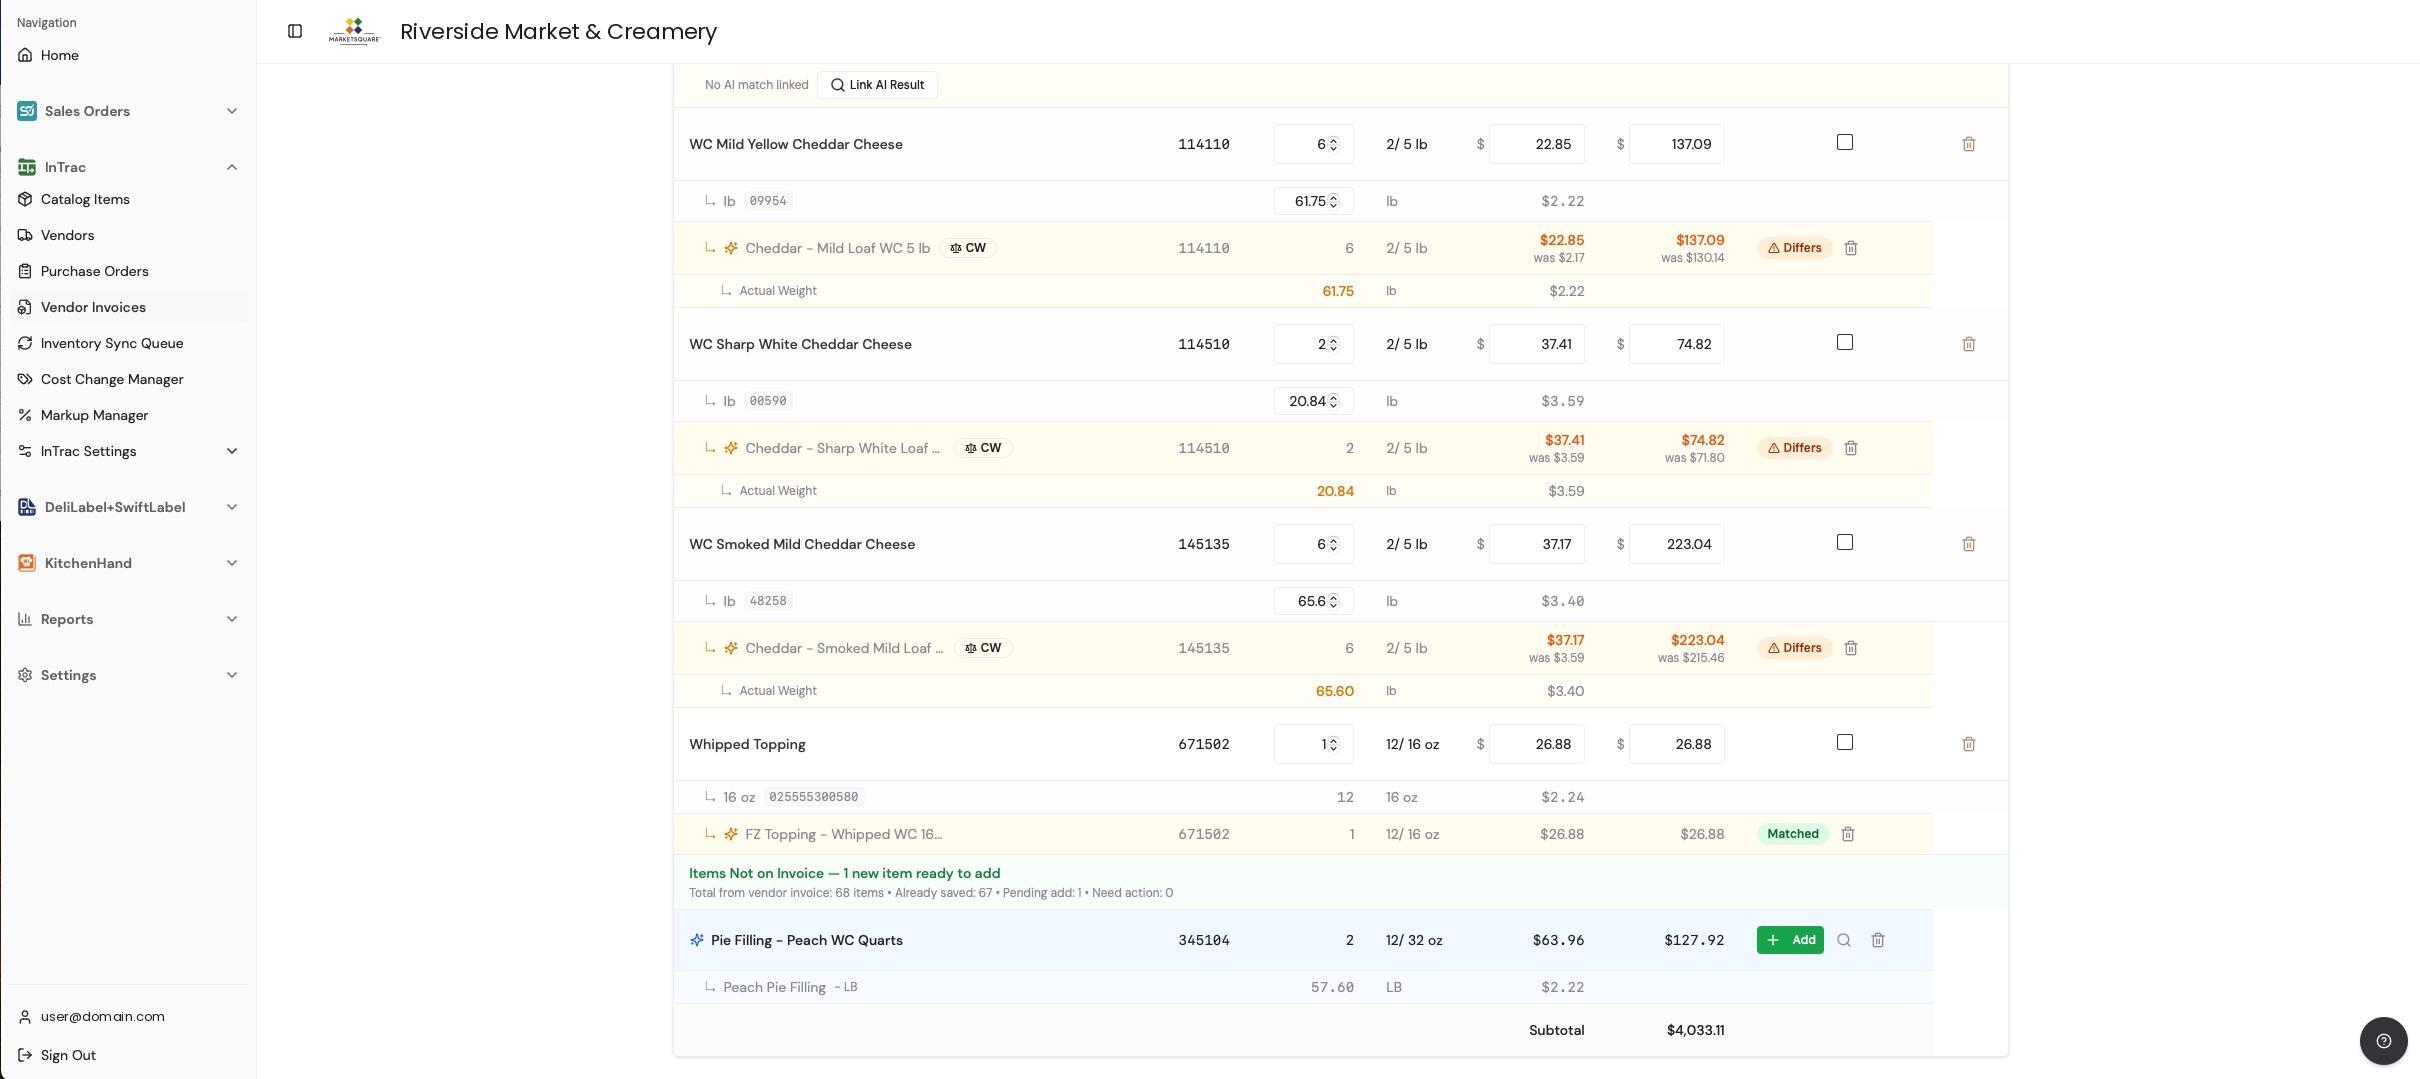
Upload the invoice under Vendor Invoices. InTrac reads it and matches each line to your catalog by vendor SKU, then labels every row so you only look at what needs you:
Matched — the line agrees; nothing to do.
Differs — the cost or extended total moved, with the previous figure shown beside it (was $2.17), so an increase is obvious at a glance.
Actual Weight — catch-weight items reconcile on delivered pounds rather than an assumed case weight.
Items Not on Invoice and Link AI Result — anything the match could not place, ready for you to add or link by hand.
A running tally at the top keeps score: how many lines the invoice holds, how many are already saved, how many are pending, and how many still need action. Work until Need action: 0, then Confirm.
Costs and inventory flow into Square On your computer
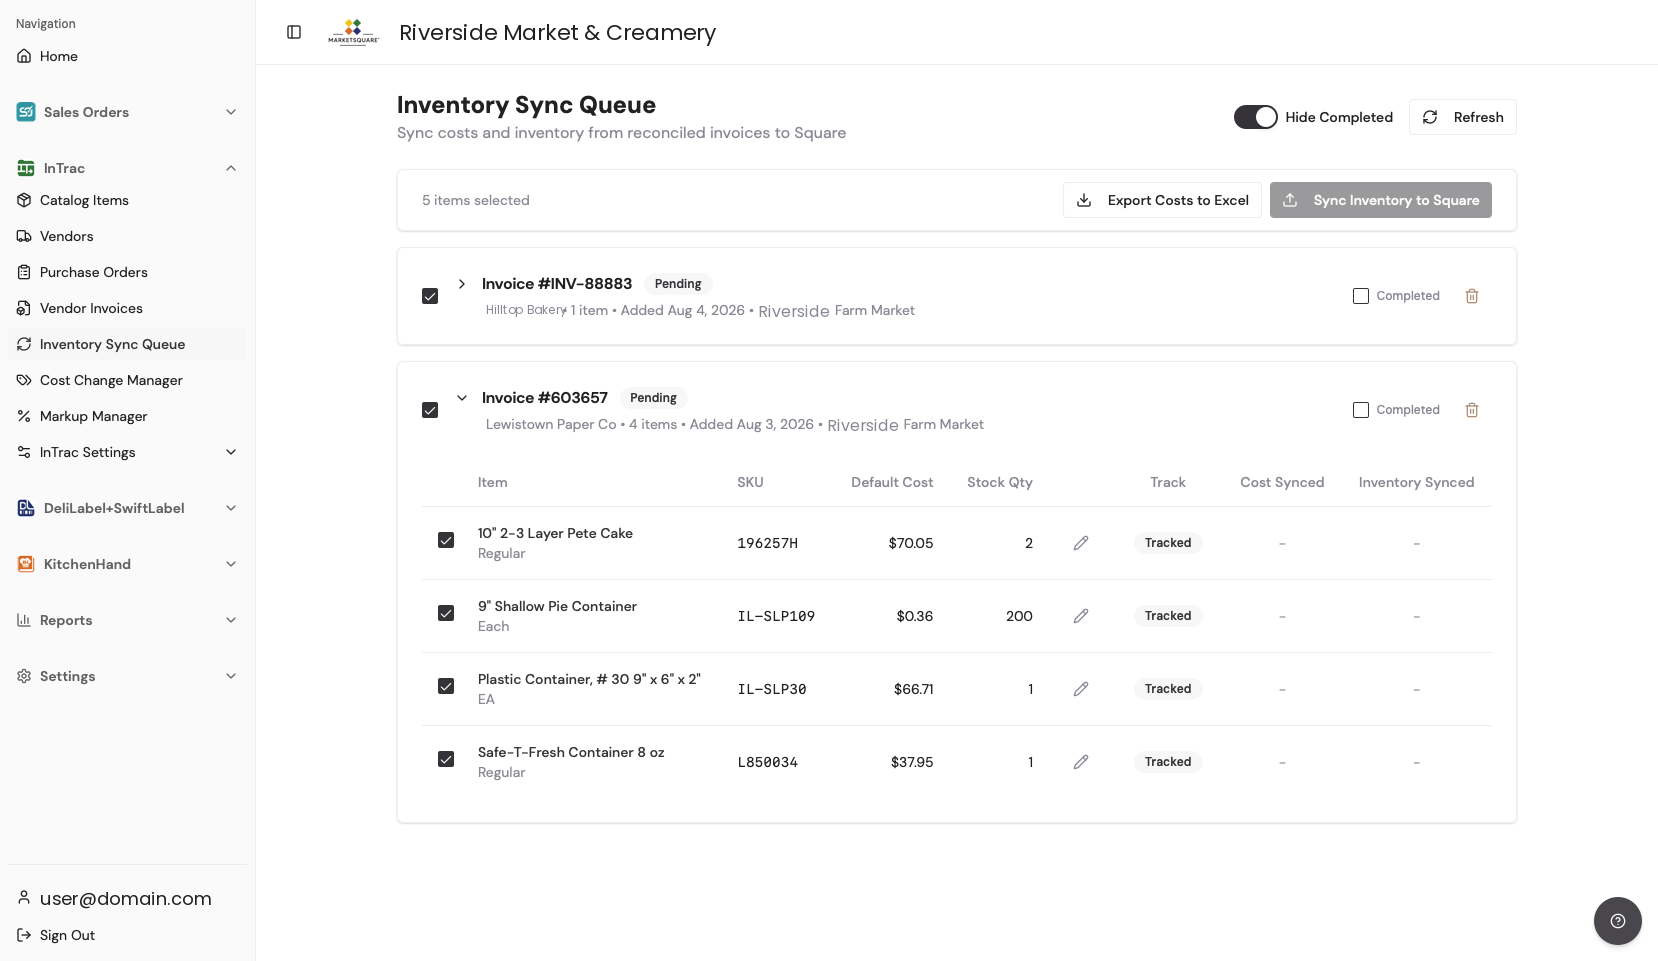
Once confirmed, the data enters the Inventory Sync Queue and flows to Square automatically — on-hand counts rise and item costs update. Any vendor price changes also appear in Cost Change Manager so you can decide whether retail prices should move (see Setting Markups & Margins).
Common questions
Is there a list view for vendors with 500+ items?
Yes — the Add Items screen is a filterable list. Combine filters, or scan a shelf tag on the app to jump straight to an item.
Can the receiving team use their own phones?
Yes. Purchasing and receiving are built for the mobile app — scan at the dock and counts log in real time.
What if the invoice arrives before the delivery?
Reconcile whenever the invoice arrives. Receiving counts and invoice lines are matched against the same order, in whichever order they reach you.